Getting Started with Lessons
Put your content on this page by using the "Add Content" pulldown menu. The most common options are
- Add Text - type text into a rich-text editor
- Add Content Link - upload a document or add a URL for a web site. This results in a link.
- Embed Content on Page - add an item that will show on the page, e.g. a Flash presentation or video.
Add Content Link and Embed Content on Page can both be used to upload a file or link to an external web page. The difference is that Add Content Link will result in a link to the item, while Embed Content on Page will put the item itself on the page. In the case of video, Embed Content will use an appropriate video player.
Once you've added content, you'll find Edit buttons next to each item where you can adjust the size of multimedia objects, change titles, add descriptive text, etc. You can also use Edit to release activities and information sequentially.
Other Things You Can Put On The Page
- Add Assignment - Choose an assignment from Sakai's Assignment tool, and add it to this page.
- Add Quiz - Choose an assignment from Sakai's Tests and Quizzes tool, and add it to this page.
- Add Forum Topic - Choose a topic from one of Sakai's forum tools, and add it to this page.
- Add Question - Put a multiple choice or short answer question on the page. Multiple choice questions can be used as polls.
- Add Comments Tool - Allow students to enter comments
- Add Student Content - Allow students to create a page with their own content. Other students can comment on it.
- Add Subpage - Create another page to contain content, and link it to this one.
- Add Website - Upload a ZIP file. Supports Camtasia, Wimba Create, and Articulate, but any ZIP file containing resources may be uploaded.
- Add External Tool - Normally you'll be told if you need to use this tool
The "Settings" button at the top controls additional features that apply to the whole page. The "Edit" buttons next to each item control features that apply to that item.
More Information
- Multimedia Content In-depth instructions and technical tips regarding various browsers
- Web Accessibility Create accessible content using Lessons
- Sequencing Require the completion of one or more tasks before others are released to students or project site participants.
Common Uses
There are several ways to use Lessons pages. Here are two of the most common:
- Organizing material by topic or unit - For major topics, which you want to appear in the left margin, go to Site Info and add a new instance of Lessons using Edit Tools. This process will ask you to supply a title for the new unit. You can change the title later with the "Edit title" button.
- Organizing material within a topic - See Example 2 in the right margin. We created pages to contain information about three specific subtopics, all linked to from the same main page. To create such a page, use the Add subpage button in the toolbar at the top of the page.
Note that Add subpage puts you into the newly created page, so you can add content. You can return to the current page using links at the top of the page.
Advanced Uses
In many cases the two methods above are all you need. However it is also possible to use Lessons to build more complex structures of pages. Here are a couple of approaches to doing that:
- Building a sequence of pages Sometimes you want students to go through a specific sequence of pages. Normally we recommend creating the pages as subpages from a single main page, as in Example 2. That makes it easy for students to review all of the material. But if you want to push students to go through in a particular sequence, you can add a link to the next page, typically at the bottom of the page. If you do this several times, you will build a sequence of pages.
To add a next page, use Add subpage, but select the option "next page". Typically you'll also want to select "show as button".
Checking "next page" gives a page that won't normally return to the current one. (Of course the student can always get to any page using the page index, unless you have restricted access to the page.)
Checking "show as button" gives you a button rather than a link.
- Going to different pages depending upon a student choice See example 3 in the right margin. Sometimes you may want to ask a question and have students go to a different page depending upon how they answer the question. To do that, ask the question using Add text , and then put two next page items under it, going to different pages. To do that, use Add subpage twice.
The options you use for Add subpage are up to you. In example 3 we used "show as button" and "next page."
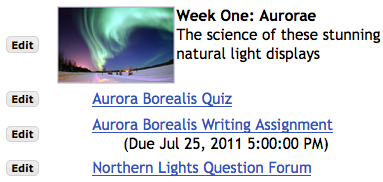
Example 1. Sample page with Add Text, Add Quiz, Add Assignment and Add Forum. The image was inserted in the web editor in Add Text.

Example 2. Sample of a unit with several sections: a small Add Text and three subpages, one for each section. Click on each subpage to add content to it.
Example 3. Going to a different page depending upon an answer. The two answers are added using Add subpage. However two options are checked: "Next page" and "Show as button". Note that Add subpage lets you create a new page or refer to an existing one.